If you want to create a beautiful newsletter template by yourself, this can be quite a challenge. You need to know HTML and CSS, and also ensure your email template is formatted to display correctly across various email programs on both desktop and mobile devices. This means that creating a newsletter template can be even more difficult than building a website!
In this guide, we’ll show you how creating an email template can be easy and as enjoyable as working with Elementor.
Not an EmailOctopus user yet? Open an account right away. With the free version, you can add up to 2500 subscribers!
Why is EmailOctopus the best option for sending your newsletter?
We chose the email marketing software EmailOctopus because the email editor is so user-friendly and functional. No unnecessary options and complete freedom to create a great newsletter.
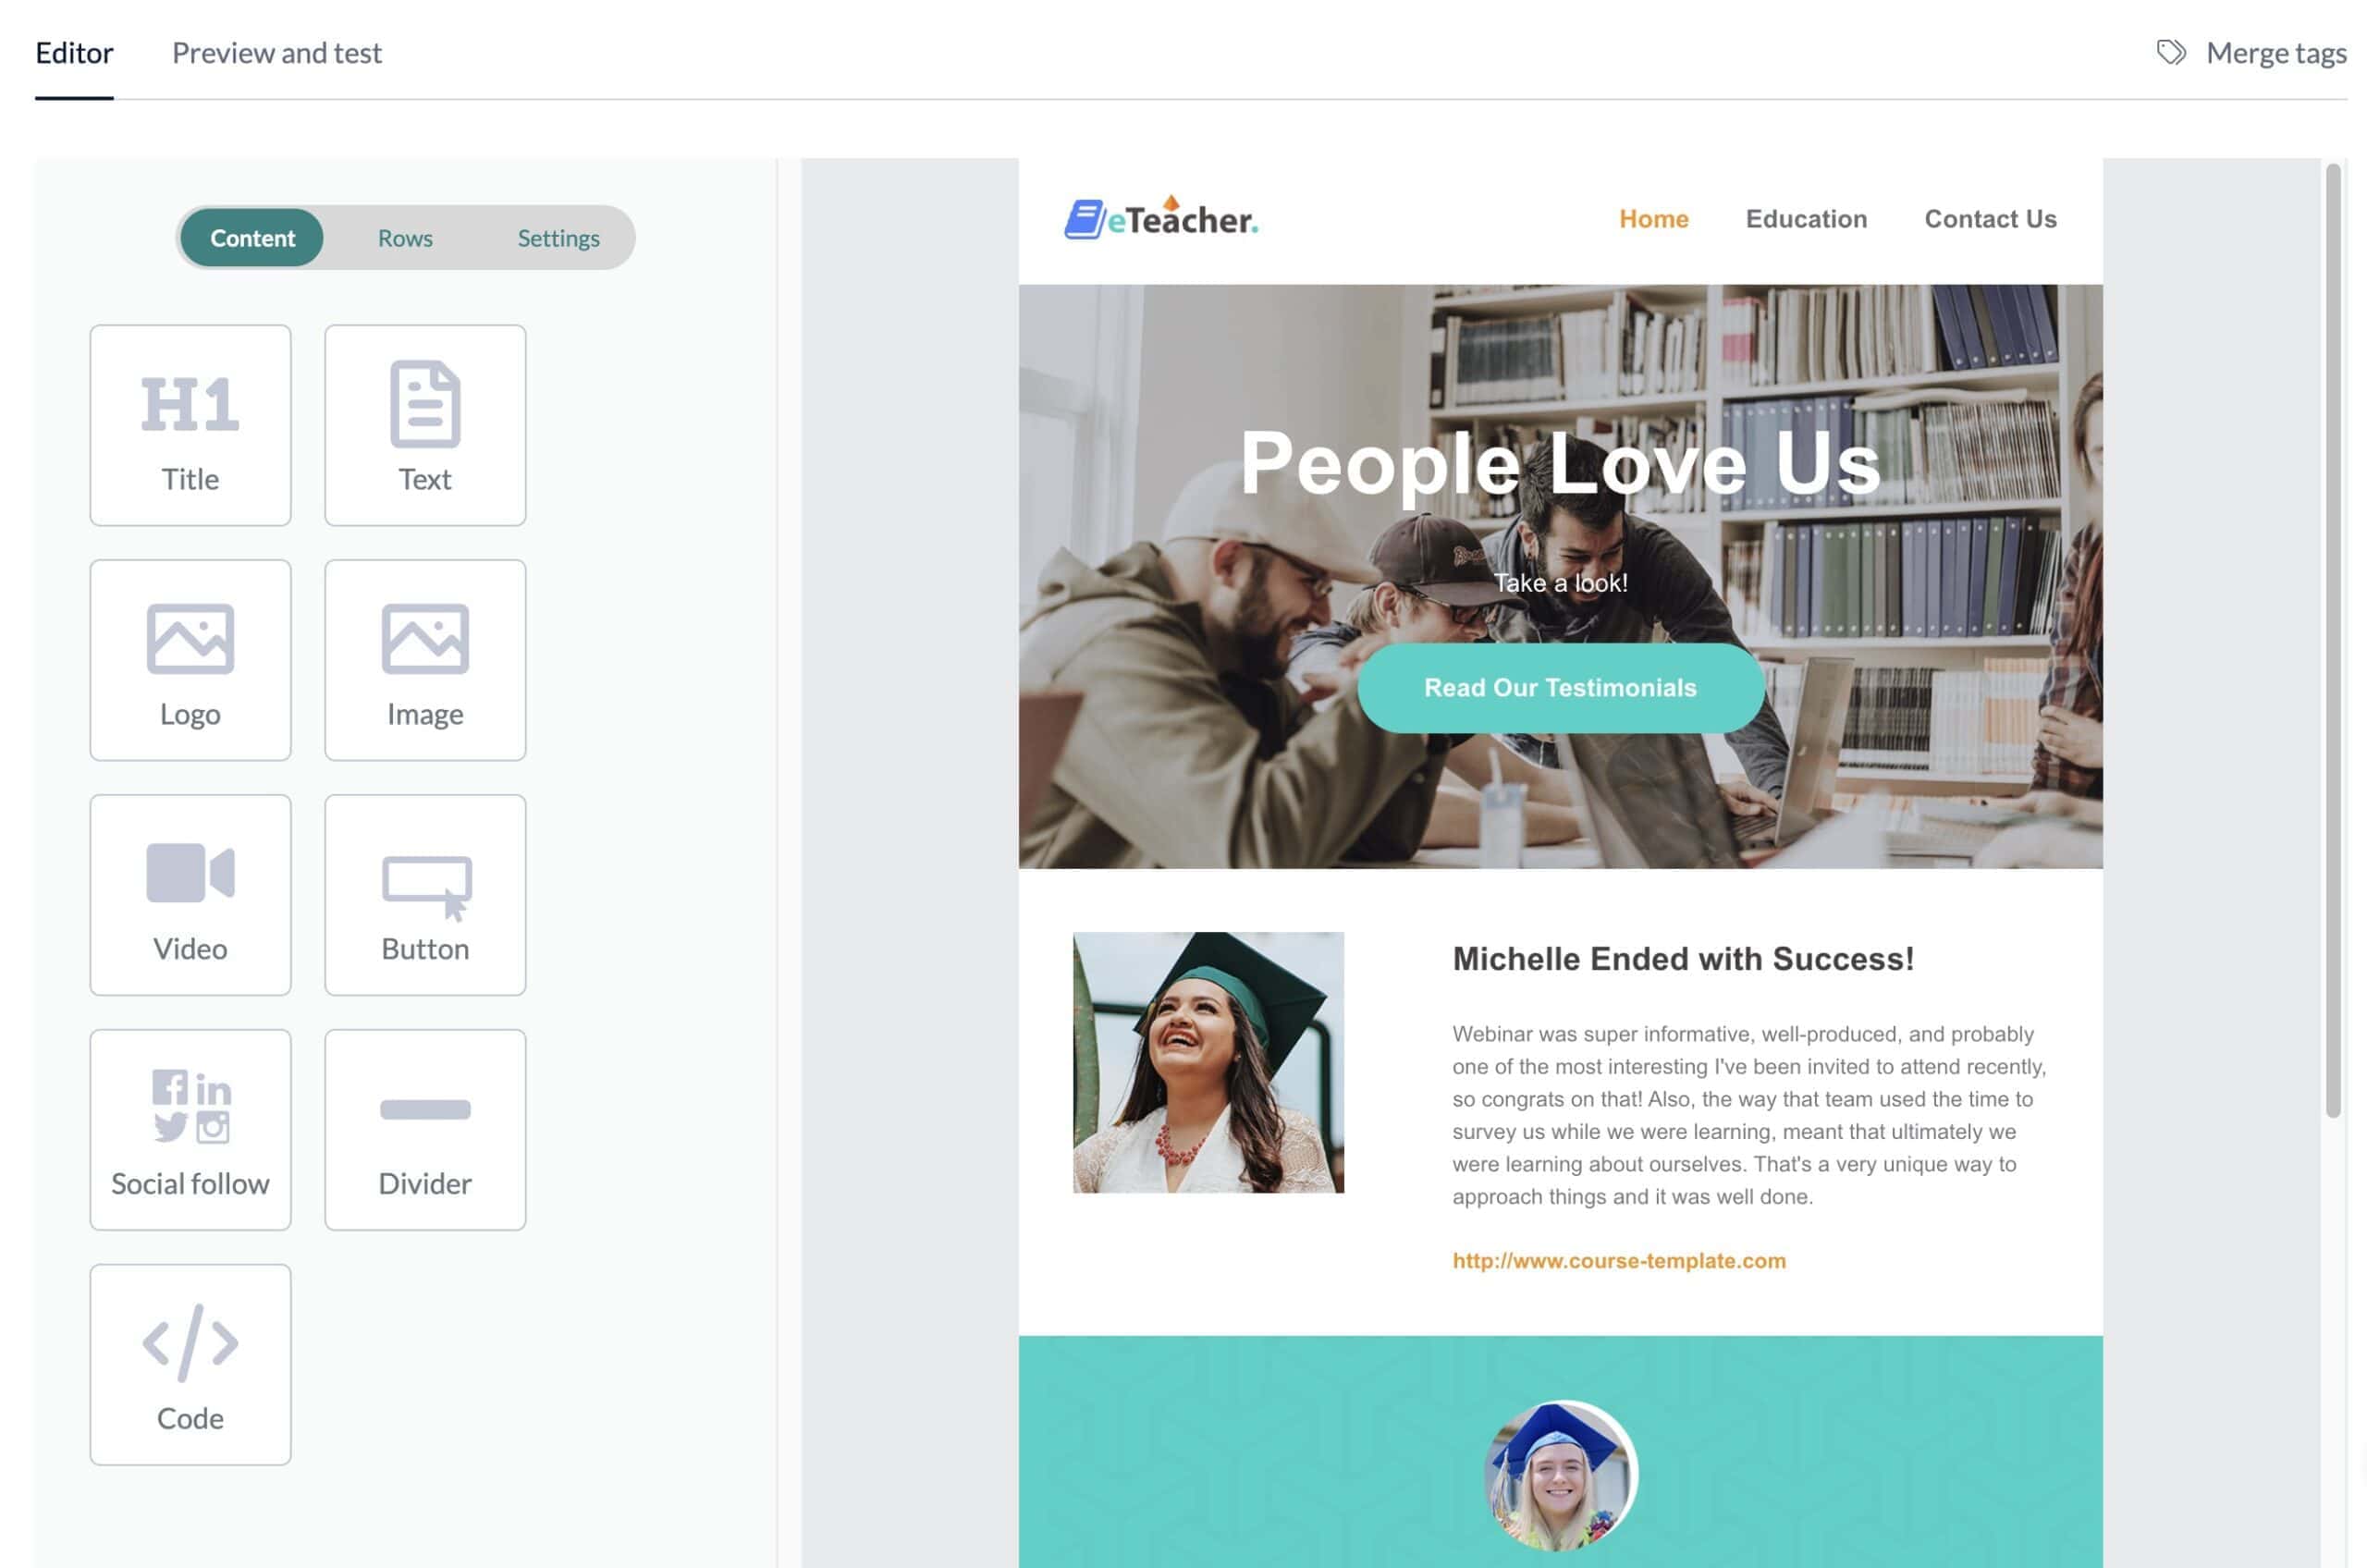
- Different column layouts – Choose from 2, 3, or 4 columns
- Title and text – Both have different properties; the text widget functions similarly to the text editor in WordPress
- Logo and images – Upload all your images or use free photos from Pexels
- Videos – Place your YouTube or Vimeo links, and the video widget automatically creates the preview image and a PLAY button of your choice
- Buttons and dividers – Place and style your buttons to encourage clicks
- Your own HTML – If an element isn’t working as desired, you can add your own code with a bit of HTML knowledge. Note: not all code works within email.
These are the available options; is there something you’re missing?
Why is it more beneficial to use a newsletter template?
You can also format your newsletter without a template, but then you will have to repeat several actions, such as choosing certain colors, fonts, spacing, standard texts, etc.
If you want to make changes later, you always do this in your template. With a newsletter template, you always start a campaign with the most recent version. Changes made in a campaign are never applied to the template.
For a new campaign, you can also reuse an older email, but this option is not available with the “Automation” feature in EmailOctopus.
Creating a newsletter template
Creating a professional email template in EmailOctopus does not require knowledge of HTML or CSS, and you can start immediately once you are logged into your account. Here are the steps:
- Enter branding
- Format email template
- Personalize email with merge tags
- Use template for automations or campaigns
Start with your own branding elements
Before you begin with your newsletter template, it’s beneficial to first set up your own “Brand elements”. Click on the menu (login name) at the top right > Account Settings > Branding tab.
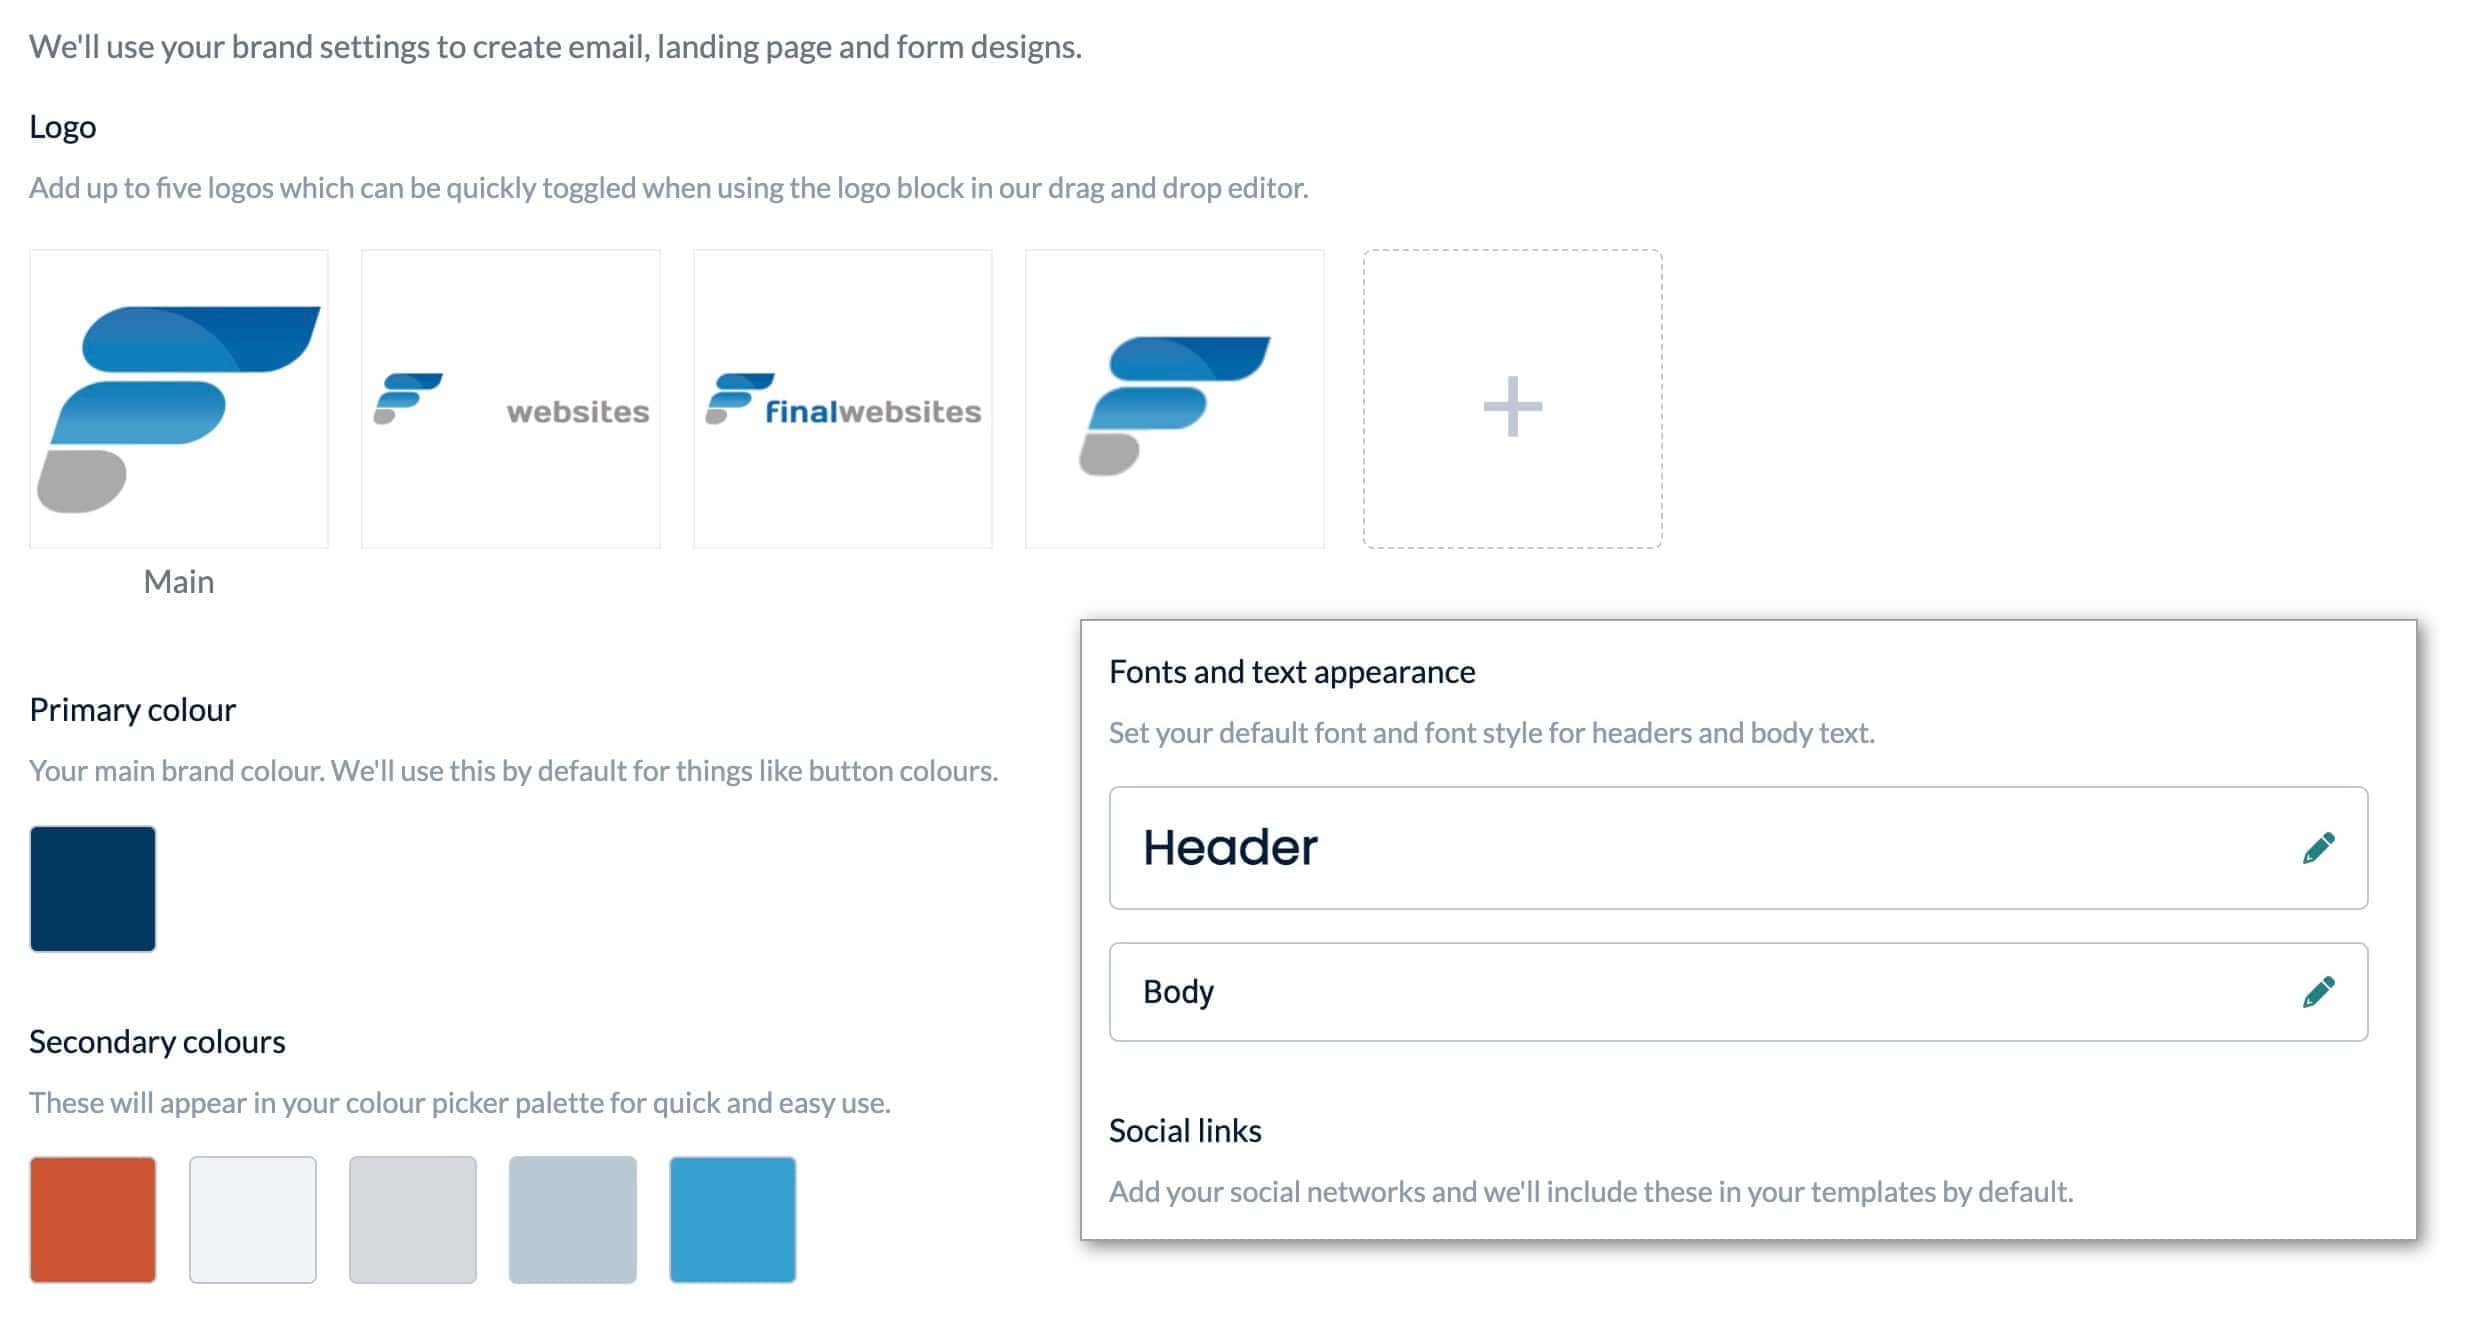
Through the “Brand” settings, you can save 5 different logos (or images), choose your most important colors, and select standard fonts for headings and the body text. These settings are immediately applied to the 4 “Branded” starter templates and can also be chosen via the email editor.
Building your newsletter template
Click on “Templates” and then on “Create”. Now you have several choices: Branded, Curated, Start from scratch, and Code your own. Since we first adjusted the “Brand” settings, it makes sense to start with one of the 4 Branded templates. Choose the base template that best suits you from the 4 options. You can, of course, also start with the “Start from scratch” option.
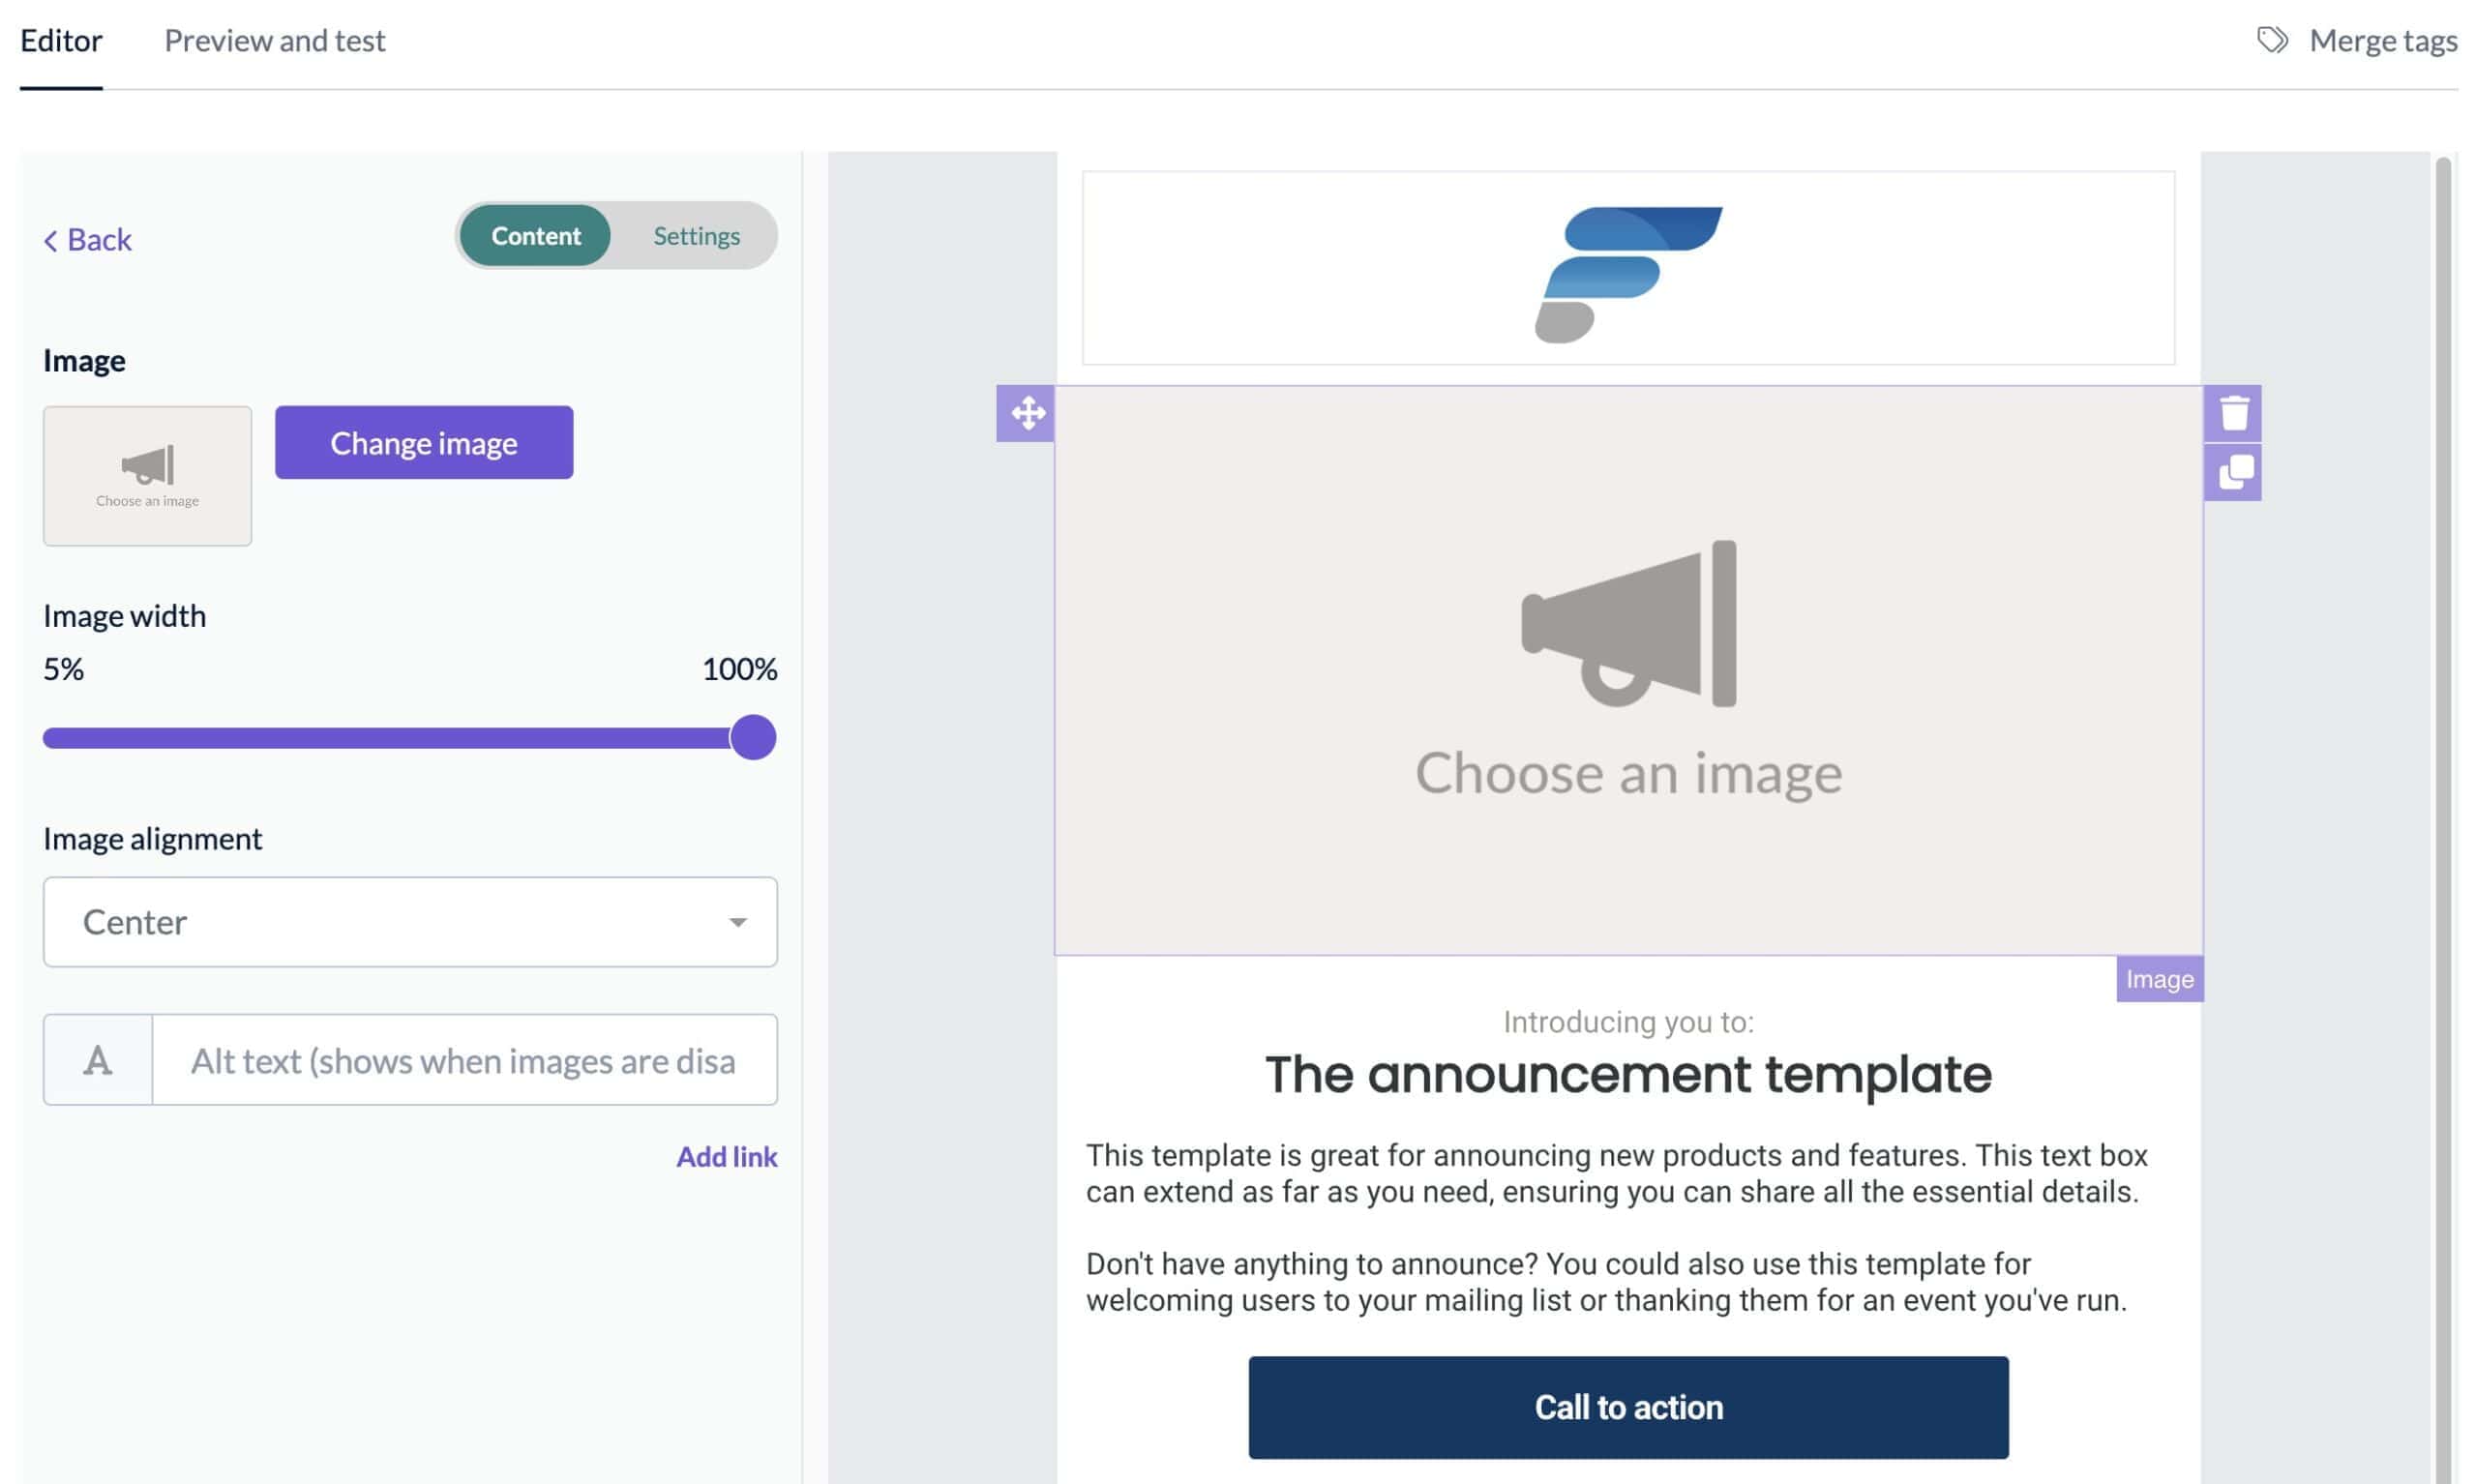
Here you see our “branded” version of the “Announce” template. As you can see, logos, fonts, and colors are immediately applied. From here, you can adjust or remove existing elements and add new ones.
All changes are immediately visible. Switch to preview mode to view your newsletter template on desktop/mobile or send a test email.
Tip! Keep some elements that you might want to use later. Sometimes it’s less work to remove an element than to create a new one. Don’t forget to save your work frequently.
Personalization with merge tags
Give your newsletter template a personal touch by using merge tags. These placeholders are placed in your email template and are replaced with a real value when the newsletter is sent. For example, {{FirstName}} with the subscriber’s name. There is a merge tag available for each field in your mailing list.
Additionally, there are merge tags like {{UnsubscribeURL}} and {{SenderInfo}}, which are mandatory and must be added to your template. Ensure that you enter {{UnsubscribeURL}} as a URL link.
Adjusting merge tags
Sometimes you might not have the subscriber’s name in your mailing list and just using “Dear” makes it less friendly. Instead, you can use Dear {{FirstName|default(“reader”)}}. If the name is empty, the word “reader” is automatically used.
When using a date field, you can adjust the standard English notation with {{YourMergeTag|date(“d-m-Y”)}}. There are many more options and even conditions available; check out this page on EmailOctopus.
Using your template for your newsletter and automations
Have you created one or more templates? You can now use these for campaigns and automations. Choose one of your own templates instead of the standard ones.
Do you want to create a new template based on your own template? Go to Templates > Create and choose your template. In this case, you will work with a copy of your template.
Gepubliceerd in: Tutorials